Basic lighting
With this tutorial you are going to learn the basics of MaxED radiosity lighting. Good lighting is half of the looks of a level and a very essential part of Max Payne technology. Just like with other aspects of mapping, there's a lot to learn in lighting. Technical knowledge is of course important but the real key is an understanding of what kind of lights to place and where, to create an environment with an atmosphere. Luckily, the radiosity is a bit like pizza -- even when it's bad, it's actually pretty good :-)
Hands on
Let's continue working with the level you've made. Here is the level file after adding a couple of lights. We'll keep things on a practical level so can you just get started with lighting and develop an understanding of what you can do with it. First, We will add one piece of geometry on the floor so something to cast shadows. Let's make a box...
1. Hit space to go to movement mode, and move to inside one of the rooms positioning yourself so that you see the floor well.
2. Align the grid to the floor (grid size is up to you): In F4-mode, activate the floor polygon by pointing at it, and hit A. If you want to make sure that the grid lines match the walls, switch to F3-mode, point one of the wall corners so that it highlights, and press A again.
3. Now draw the box (or say, a pillar) to any shape and size you please and extrude it. Depending on if you had "preferences/flip faces after mesh creation" selected or not, the box is now either object-like (polys pointing outward) or room-like (polys pointing inward). Obviously we need to make it an object, so if the polys are pointing in, flip them: go to F4-mode, point at the box it to make sure it's highlighted and press Ctrl-F.
4. To use the same texture as the ceiling, you can either select it from the materials menu, or just grab it from the ceiling (in F6-mode, point the ceiling and press G). Since you now know the basics of texturing you can try for yourself and see what kind of a box you come up with.
5. Remember to group the box to the room: Go to F5-mode, LMB click the box, press G and LMB click the room it's in. Rooms are always the top-most objects in the hierarchy tree and all other objects have to be below them in some order.
As you can see, simple shapes inherit much to their looks just from the way the texture is placed. With this texture placement it looks as if the box had an extruding top and bottom.
As lighting calls for a lamp mesh, it is the obvious choice for our next piece of furniture. Following the above sequence, make a light element above the door and texture it. Note that besides the color that you assign to a light, the actual color of the light is also affected by its texture; if you assign white color to a light that has a blue texture, the resulting light color will pretty much be blue.
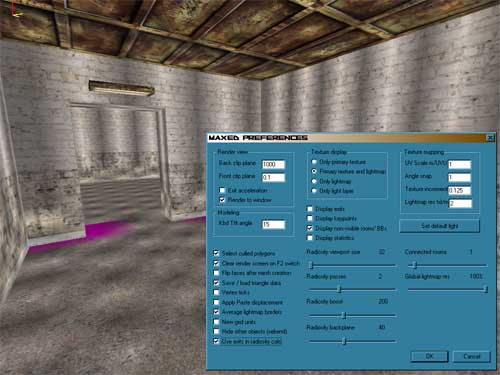
When you have your light element in place, it's time to add the actual light. Also turn on the rendering of the lightmaps. To do that, open preferences and from the "texture display" -radio buttons, check "primary texture and lightmap". Now you'll see both the texture and the lightmap on top of it.
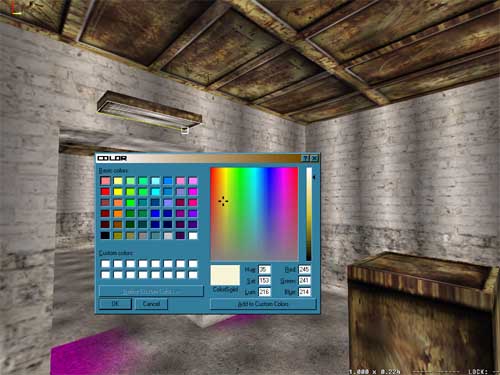
In F6-mode, point at the surface of your light element that you want to cast light, press L and pick any color you like. In general, plain, almost white hues work well, since the light will gather a lot of color from both the texture of the light surface, and any successive surfaces it bounces from.
1. Open preferences and set "radiosity viewport size" to 32, "radiosity passes" to 2 and "radiosity boost" to 200. Click OK. These values are quite enough to show the resulting amount and placing of light and shadow.
2. Go to F5-mode and press CTRL-E to autogroup all objects to the rooms they are in, in case you left something ungrouped.
3. Still in F5-mode, press ESC (to clear selection), switch to move mode (SPACE) and press R (start rendering)
4. Click "NO" when asked if you want to use the preview algorithm. This level is very small and with the above settings won't take more than couple of minutes to render on a ~700MHz machine.
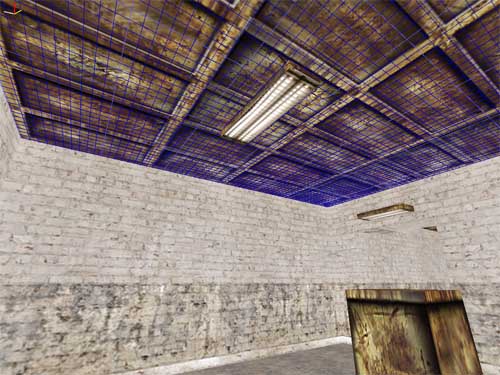
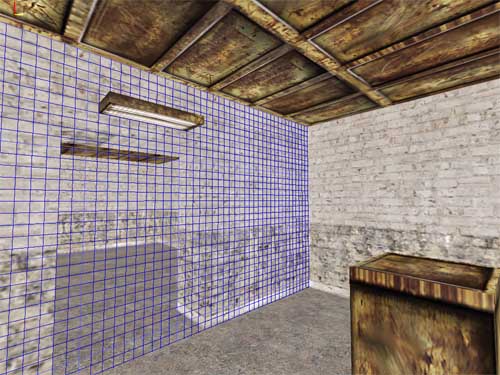
MaxED goes to the wireframe mode after it has rendered the lightmaps, so when it’s done, switch back to texture rendering mode (F2) to see the results. The level should look something like this:
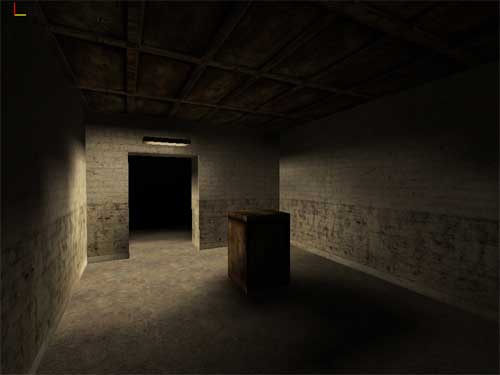
Just how well you managed to get this kind of results doesn't matter, the important thing is that you become accustomed to how the lights work.
Ok you've done well. I'll add one more light element and you can just watch.
This one will go to the ceiling killing a lot of the shadows. It's also a bit longer than the door light
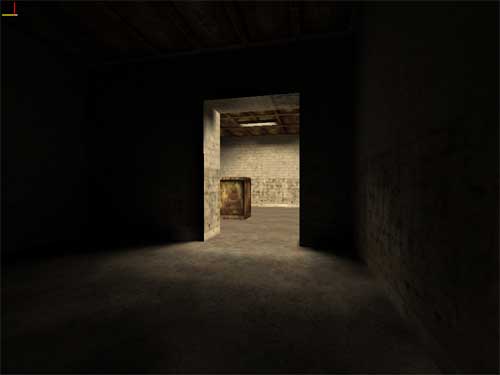
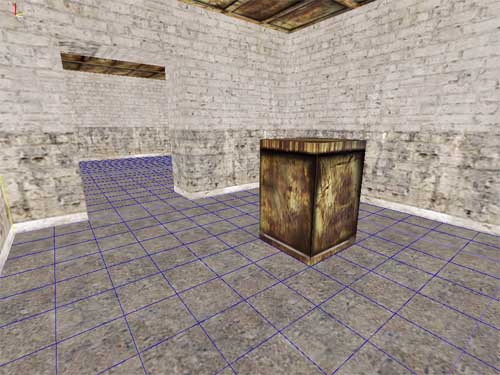
As you can see, from the room the lamps are in, shadows are now practically gone, due to the extra amount of light coming straight down from the new element. Since there are no light elements in the other room, the light can be seen "pouring" in through the doorway, creating a nice effect.
You can now use NumPad / to cycle Textures/Textures+Light/Lighting modes in the render display, or use the Preferences dialog. Note however, that while in small maps it's faster to use numpad / to cycle the modes, in larger maps the transition takes time and in the lack of immediate response, it might be unclear whether you pressed / the correct amount of times and it is simpler and oftentimes just quicker to open preferences (CTRL-P) and select the right mode.
Also try rendering with the preview lighting. It doesn’t give you as good results, but it’s a lot faster. Start rendering as you did before, but choose “Yes” to the question about preview lighting and accept the default shoot amount, it's good for mostly all occasions.